Creative Science for Kids
Explore science facts, intriguing scientific discoveries, and hands-on activities to try yourself at home. The perfect way to spark an interest in science and to feed the minds of science-curious children aged 8 to 12 years. Jenny Lynch is a science show presenter, writer, and science kit inventor, with a knack for making complicated scientific ideas fun, fascinating, and easy to follow.
Support the podcast and keep it ad-free! buymeacoffee.com/creativescience








Episodes

Oct 17, 2025
Oct 17, 2025
13 min
Let’s get immersed in a high-tech virtual world with five fascinating fast facts about virtual reality, an interview with Dr Vanessa Moss, an astrophysicist who uses virtual reality to collaborate with other scientists, and an eye-opening binocular activity for you to try yourself at home.
Written, presented, and produced by Jenny Lynch. Music by Purple Planet Music. Sound effects by Pixabay.
Creative Science: https://www.creativescience.com.au
Facebook: @creativescienceaustralia
Instagram: @creative_science_australia
Episode content:
00:00 Introduction and fast facts
04:05 Interview with Dr Vanessa Moss
10:33 Dominant eye activity
Virtual science exhibition, The Future of Meetings TFOMxCSIRO Exhibition Hall
NOTE: This virtual space uses quite a lot of data (100MB). The space is compatible with Safari, Chrome and Edge browsers (partial support for Firefox). It is also accessible via the Spatial.io phone app or Oculus Quest 2 (VR).
https://www.spatial.io/s/TFOMxCSIRO-Exhibition-Hall-64a1609a2e4f7d91d95a43bd?share=9027864886891104356
Dominant eye activity instructions:
The hand you use for writing is your ‘dominant hand’ and most of us are either left-hand dominant or right-hand dominant. A few people are ambidextrous, which means they can use one hand just as easily as the other.
Did you know that you probably have a dominant eye as well as a dominant hand?
Follow these steps to test which is your dominant eye.
Stretch your arms out in front of you and use your fingers and thumbs to make a triangle shape that you can see through.
Focus on an object in the distance and keep staring at it.
Keep your arms stretched out, but slide your hands together to make the triangle smaller, while still looking at the distant object.
Keep looking at the object, and close one of your eyes.
If you can still see the object, the eye that is still open is your dominant eye.
If you can’t close one eye at a time by winking, try asking someone to help you by carefully covering one of your eyes with their hand.
If you can’t see the object, switch eyes, so the other eye is closed.
If you can now see the object with your open eye, then this is your dominant eye.
If it didn’t work, try again, or maybe you are one of the few people who does not have a dominant eye.
As well as testing for your dominant eye, this activity demonstrates how each of your eyes sees a slightly different picture of your surroundings. Virtual reality relies on this binocular vision to create realistic images of three-dimensional worlds.

Sep 12, 2025
Sep 12, 2025
13 min
Get ready to launch into fascinating fast facts about space junk, an interview with Mars Buttfield-Addison, a computer scientist and science communicator who knows a lot about space debris, and an easy orbital activity for you to try yourself at home.
Written, presented, and produced by Jenny Lynch. Music by Purple Planet Music. Sound effects by Pixabay.
Creative Science: https://www.creativescience.com.au
Facebook: @creativescienceaustralia
Instagram: @creative_science_australia
Episode content:
00:00 Introduction and fast facts
03:28 A big collision in space
04:10 Interview with Mars Buttfield-Addison
10:49 Orbiting sock activity
Orbiting sock activity instructions:
You will need: a pair of long socks, for example, knee-high socks or football socks,
or ask if you can borrow a pair of adult-sized socks.
Roll up one of the socks and push it down into the other sock, so it is in the toe end of the sock.
Make sure you have plenty of space around you before doing this step. Hold the open end of the sock and swing the sock around in a circle, so the rolled-up sock is orbiting your hand. Make the sock swing around in a circle as fast as you can, and then slow down the speed until the sock only just stays in a nice, round circle-shaped orbit.
Hold the sock about halfway along the length, so the orbit is smaller. Swing the sock around again so it orbits your hand in a smaller circle. Make it swing around as fast as you can again, and then slow down the speed while keeping it in a circle-shaped orbit.
What do you notice about the speed of the larger orbit compared to the smaller orbit?
The sock can orbit a lot slower in the larger orbit compared to the smaller orbit.
This is only a model made from socks, so the forces are a bit different compared to a real satellite orbiting Earth. In our sock model, the long sock is providing the force to keep the rolled-up sock in its orbit, so the long sock is a bit like gravity holding a satellite in orbit.
A satellite is held in orbit by the force of gravity. For lower orbits, the force of gravity is stronger and a satellite in a lower orbit has to move faster to avoid falling down to Earth. Higher orbit satellites experience less gravitational pull, and they move more slowly to stay in orbit.

Aug 8, 2025
Aug 8, 2025
12 min
Saturday 9 August to Sunday 17 August 2025 is National Science Week in Australia, so it’s time to blow your mind with five fun and fascinating fast facts about different types of science, some mind-blowing recent discoveries in science, a few different voices sharing their favourite mind-blowing science, and an activity that’s oozing with science for you to try yourself at home.
Written, presented, and produced by Jenny Lynch. Music by Purple Planet Music. Sound effects by Pixabay.
Creative Science: https://www.creativescience.com.au
Facebook: @creativescienceaustralia
Instagram: @creative_science_australia
National Science Week
Find free resources and National Science Week events happening near you:
https://www.scienceweek.net.au/
DIY Science activities: https://www.scienceweek.net.au/diy-science/
See Creative Science live on stage at these Sydney events:
Saturday 9 August 2025, Sydney Science Trail at the Australian Museum
Sunday 10 August 2025, Science in the Scrub at Western Sydney Parklands
Sunday 17 August 2025, Science in the Swamp at Centennial Park
Thanks to Inspiring Australia NSW for helping us connect with special guests:
Eylem Altuntas, Developmental Psychologist, Western Sydney University
Jinx Moore, Medical Research Scientist, University of Technology Sydney
Dr Patrick Capon, Science Communicator, Australian Red Cross Lifeblood
Dr Alison Gould, Science Communicator, Australian Red Cross Lifeblood
Kira Lowe, PhD Candidate, University of Wollongong
Kenya Fernandes, Microbiologist, University of Sydney
Alicia Haines, Forensic Biologist, University of Technology Sydney
Episode content:
00:00 Introduction and fast facts
4:30 New discoveries in science
6:10 Special guests with mind blowing ideas
9:20 Elephant toothpaste activity
Elephant toothpaste activity instructions:
You will need: A measuring cup, some warm water, a small jug, a teaspoon of dry yeast, a small plastic drink bottle, some dishwashing liquid, and a few drops of food colouring.
You will also need about 100 millilitres of 3% hydrogen peroxide.
Ask an adult if you have any at home or you can find it at a pharmacy.
Be careful when using the 3% hydrogen peroxide because it can stain clothes and other material, and you might like to wear gloves to protect your hands.
This activity is pretty messy so you should do it on a tray next to the kitchen sink or in a sheltered outside area.
Use the measuring cup to add about 50 millilitres of warm water to the small jug.
Add one teaspoon of dry yeast to the warm water, stir it gently, and leave it to sit for 5 or 10 minutes to ‘activate’ the yeast. You will know when it’s ready because there will be bubbles on top of the water.
While you’re waiting for the yeast mixture to bubble, use the measuring cup to add about 100 millilitres of 3% hydrogen peroxide to the plastic bottle.
Add a big squirt of detergent and a few drops of food colouring to the bottle and swirl the bottle to mix the liquids.
NOTE: If you want to make a video or take a photo of the Elephant Toothpaste reaction, get ready now before you do the next step, because the reaction will happen quickly.
Pour the yeast mixture from the jug into the bottle, step back and see what happens. You should see bubbly foam oozing up and out of the bottle.
The chemical formula for hydrogen peroxide is H2O2 and you might notice that it is made up of hydrogen and oxygen atoms, just like water, which has the chemical formula H2O. Hydrogen peroxide slowly breaks down to turn into water and oxygen gas.
Yeast contains a chemical called ‘catalase’ which speeds up this reaction. The bubbles you see in the Elephant Toothpaste are bubbles of oxygen gas made by the hydrogen peroxide breaking down. Hydrogen peroxide can cause damage to the cells in living things, like us humans and the yeast used in this activity, so many living things make the chemical ‘catalase’ to get rid of hydrogen peroxide.
Jul 11, 2025
Jul 11, 2025
14 min
Let’s step back in time with five fascinating fast facts about how scientists date the ages of ancient artefacts, an interview with Belinda Huntriss, a Worimi woman who is passionate about sharing her knowledge of Aboriginal science and technology, and a tasty sedimentary layer activity for you to try yourself at home.
Written, presented, and produced by Jenny Lynch. Music by Purple Planet Music. Sound effects by Pixabay.
Creative Science: https://www.creativescience.com.au
Facebook: @creativescienceaustralia
Instagram: @creative_science_australia
Belinda Huntriss: https://freshwater-education.com/
Freshwater Education: Aboriginal education consultancy, professional development workshops, teaching resources, keynote speaker, educator mentoring
Books mentioned by Belinda:
Young Dark Emu – A Truer History by Bruce Pascoe
The First Scientists by Corey Tutt
Episode content:
00:00 Introduction and fast facts
04:07 Deep dive into the Madjedbebe rock shelter in Arnhem Land
05:28 Interview with Belinda Huntriss
12:24 Edible sedimentary layers activity
Edible sedimentary layers activity instructions:
You will need: a bowl, a few spoons, a glass or tumbler, 2 or 3 biscuits or cookies of your choice, custard or chocolate pudding, chopped fruit and sprinkles.Note: You don’t have to use all of these ingredients to make the sedimentary layers. You might have some tastier ideas you’d like to try.
Place the biscuits or cookies on a chopping board or in a bowl and make biscuit crumbs by crushing the biscuits with the back of a large spoon.
Make layers of the ingredients in the glass or tumbler, by adding the ingredients one layer at a time. Start by covering the bottom of the glass with biscuit crumbs. Add a layer of custard or pudding, a layer of chopped fruit and a few sprinkles.
Repeat the layers, starting again with biscuit crumbs, and keep adding layers until you are happy with your sedimentary layer dessert.
Use a small spoon to dig into the layers and eat your dessert. You can travel back in time to a few minutes ago when you added the first layer of biscuit crumbs!
Sedimentary layers form when small pieces of rock, sand, and soil settle on top of each other. The layers can also include left over material from plants and animals. As more and more layers are buried, pressure and time causes solid rock to form, and this type of rock is called ‘sedimentary rock’.
Jun 13, 2025
Jun 13, 2025
12 min
It’s time to fire up the mind with five fun and fascinating fast facts about imagination, plus some questions for Sarah Macdonald and Max Gambale, two creative people with interesting imaginations, and a visualisation and drawing activity for you to try yourself at home.
Written, presented, and produced by Jenny Lynch. Music by Purple Planet Music. Sound effects by Pixabay.
Creative Science: https://www.creativescience.com.au
Facebook: @creativescienceaustralia
Instagram: @creative_science_australia
Episode content:
00:00 Introduction and fast facts
03:43 Deep dive into aphantasia
04:30 Interview with Sarah Macdonald and Max Gambale
10:09 Visualisation and drawing activity
Visualisation and drawing activity instructions:
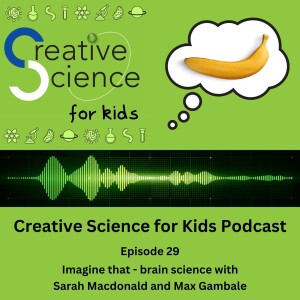
You will need: two pieces of paper, coloured pencils, and a banana. You don’t have to use a banana, but you will need an object that has a familiar shape and that is not too complicated to draw.
Hide the banana so you cannot look at it while you draw. In your mind’s eye, picture a banana in as much detail as possible. If you have aphantasia, you might be thinking of the idea of a banana and the concept that it is yellow, or maybe a bit green, and that it has a curved shape.
Draw a picture of the banana you are thinking about. Take your time to draw as much detail as possible. When you have finished your drawing, turn the paper over so you can’t see the picture.
Take the banana out of its hiding place, put it down in front of you, and look at it very carefully. Look at the colour and shape of the banana. Can you see any shadows on the banana and any markings on the skin?
Draw a picture of the banana and look at the real banana as many times as you like to try to make your drawing as realistic as possible.
When you have finished drawing the real banana, turn over the first drawing and compare your two pictures. Did you find it easier to draw a picture of a banana when you could see the real banana? Or did you find it difficult to draw all of the details?
When we picture a banana in our mind, we often see a simple image of a curved yellow shape, and maybe some black spots. Looking at a real banana reveals many details that we might not imagine in our mind. To draw a realistic picture, it also takes a lot of practice and skill to make an accurate drawing of what we are observing with our eyes.

May 16, 2025
May 16, 2025
12 min
It’s time to take a deep breath and get ready for five fascinating fast facts about breathing, an interview with Dr Kenneth Soo, a hospital-based doctor who knows a lot about breathing, and an energetic activity for you to try yourself at home.
Written, presented, and produced by Jenny Lynch. Music by Purple Planet Music. Sound effects by Pixabay.
Creative Science: www.creativescience.com.auFacebook www.facebook.com/creativescienceaustraliaInstagram www.instagram.com/creative_science_australia
Episode content:
00:00 Introduction and fast facts
03:45 Respiration with Dr Kenneth Soo
09:59 Breathing rate activity
Breathing rate activity instructions:
You will need: a pen and paper and a timer (e.g. a smartphone timer, a stopwatch, or a clock with a second hand).1. Sit quietly, breathing normally, and time exactly 60 seconds while you count the number of times you breathe in 60 seconds. A full breath in and a full breath out is counted as one breath. After you have counted your breaths for 60 seconds, write down the result. This number is your breathing rate, which is the number of breaths you take in one minute.
2. Repeat Step 1 to measure the resting breathing rate two more times to get a more accurate result.
3. Time another 60 seconds and do some very energetic star jumps, otherwise known as ‘jumping jacks’, and try to really push yourself to jump high and go as fast as you can.
4. Stop jumping, time 60 seconds, and measure your breathing rate again, by counting your breaths for 60 seconds, and write down the result.
5. If you are feeling energetic, Repeat Steps 3 and 4, by exercising again and re-measuring your breathing rate.
Did your breathing rate change after you exercised? When you exercise, your muscle cells use up oxygen and sugar and they make carbon dioxide. Having too much carbon dioxide in the blood makes the blood more acidic. This triggers the body to breathe faster to get rid of the extra carbon dioxide from the body. Breathing faster helps your body remove carbon dioxide from the blood and it delivers more oxygen to your cells.
Apr 11, 2025
Apr 11, 2025
15 min
Let’s get fired up with five fascinating fast facts about climate science, a deep dive into carbon footprints, an interview with Stuart Goldsmith, an English comedian with a passion for communicating about climate change, and a sea level experiment for you to try yourself at home.
Written, presented, and produced by Jenny Lynch. Music by Purple Planet Music. Sound effects by Pixabay.
Creative Science: www.creativescience.com.auFacebook www.facebook.com/creativescienceaustraliaInstagram www.instagram.com/creative_science_australia
Episode content:
00:00 Introduction and fast facts
03:41 Carbon footprints and reducing carbon emissions
05:43 Stuart Goldsmith and climate comedy
12:58 Rising sea level activity
For adult listeners, find out more about Stuart Goldsmith’s stand-up comedy, climate comedy, and comedy podcast: https://www.stuartgoldsmith.com
Rising sea level activity instructions:
You will need: A few ice cubes, two small drinking glasses that are the same size and shape, sticky tape, and a rock or some other heavy object that will fit in the base of one of the small glasses.
Place the two small glasses side-by-side on a bench.
Put the rock in the bottom of one of the glasses and add water to this glass until the water is just below the top of the rock.
For the other glass, add water until the water is at about the same level as the glass with the rock.
Place one or more ice cubes on the rock, making sure the ice is not touching the water.
Add the same number of ice cubes to the glass without the rock, making sure the ice cubes are floating. If they are not floating, add some more water to the glass.
Use sticky tape to mark the water level in each glass. You might have to dry the outside of the glasses with a cloth to get the tape to stick and you should carefully line up the side of the tape with the surface of the water before sticking it to the glass.
Wait until all of the ice cubes have completely melted and then look at the water level in each glass. Have the water levels changed?
When land ice melts, like the ice in glaciers, the melt water causes the sea level to rise. When sea ice melts, the sea level doesn’t change much because the ice was already floating in the sea. However, with less sea ice, the ocean absorbs more light from the Sun, which makes the oceans warm up even more. And when the oceans warm up, the volume of water in the sea increases, causing the sea level to rise.
Mar 14, 2025
Mar 14, 2025
10 min
Let’s get growing with five fascinating fast facts about seeds, a deep dive into seed banks, an interview with Cassy Polimeni, a children’s author who writes stories featuring science, and a see-through seed growing activity for you to try yourself at home.
Written, presented, and produced by Jenny Lynch. Music by Purple Planet Music. Sound effects by Pixabay.
Creative Science: www.creativescience.com.auFacebook www.facebook.com/creativescienceaustraliaInstagram www.instagram.com/creative_science_australia
Episode content:
00:00 Introduction and fast facts
03:09 Seed banks
03:47 Cassy Polimeni and ‘The Garden at the End of the World’
08:33 CD bean plant activity
Cassy Polimeni: https://cassypolimeni.wordpress.com/
UWA Publishing: https://uwap.uwa.edu.au/collections/ella-and-the-frogs-series
CD Bean Plant Activity Instructions:
You will need: Old CD case, moist soil or potting mix, broad bean seeds, and a shallow tray. If you can’t find a CD case, you can try using a DVD case or a clear plastic zip lock bag instead.
Open the CD case, lay it out flat on a bench and take out the plastic inner part. The inner part is often made from black plastic and it has the round part that holds the CD.
At the end of the CD case that doesn’t have the hinge, add some moist soil or potting mix and place up to three broad bean seeds in the middle of the soil.
Close the CD case and stand it up in the plastic tray. You might need to lean the CD case against a wall or a box so it stands up on its side with the soil at the bottom.
Leave the CD case until the first signs of germination appear, with roots and leaves growing out of the seed, and continue to observe the plant growing over several days. You will need to keep the soil moist by adding a small amount of water through the gap at the hinged end of the CD case.
A dry broad bean seed stays dormant until it has the soil and water it needs to grow. The seed has enough energy and nutrients to start growing, but it soon starts making food from carbon dioxide gas in the air and takes up water and nutrients through the roots.
As the bean plant grows, the different parts of the plant can be observed through the clear CD case, including the roots, stem, and leaves. The stem grows up and the roots grow down because the plant can detect light and the force of gravity.
Feb 14, 2025
Feb 14, 2025
10 min
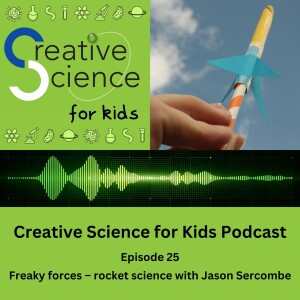
It’s time to lift off with five fascinating fast facts about rockets, a quick look at some famous rocket launches, an interview with Jason Sercombe, a scientist who knows a lot about building and launching model rockets, and an easy-to-make rocket for you to launch yourself at home.
Written, presented, and produced by Jenny Lynch. Music by Purple Planet Music. Sound effects by Pixabay.
https://www.creativescience.com.au
Episode content:
00:00 Introduction and fast facts
04:42 Building and launching model rockets
08:42 Straw rocket activity
You will need: a sheet of paper, a drinking straw, scissors, and sticky tape
Use the sheet of paper to make a tube that fits over the drinking straw. Place the straw along one side of the paper and cut a rectangle of paper that is about 3 centimetres shorter than the straw and can wrap around the straw. Wrap the rectangle around the straw to form the tube and use sticky tape to hold the tube together. Make sure the tube can slide easily over the straw to ensure a smooth rocket launch.
Take the rocket tube off the straw and twist the paper at one end to seal off the end of the rocket. This end is the nose cone.
Look at some pictures of rockets and use the paper and scissors to make 3 or 4 fins for the paper rocket. Use sticky tape to attach the fins to one end of the rocket: the end that is closest to the open end of the rocket.
Slide the rocket onto the paper straw, aim it at an open space, away from other people, and blow quickly into the straw to launch the rocket. Experiment with holding the straw at different angles and blowing harder into the straw to get the maximum flight time. You can also try making different fin designs.
Jan 17, 2025
Jan 17, 2025
12 min
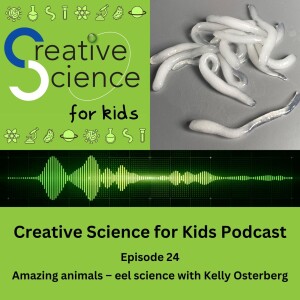
Let’s get slimy with five fascinating fast facts about eels, an intriguing story about long-finned eels from Kelly Osterberg, an educator who knows a LOT about eels, and a gooey eel activity for you to cook up at home.
Written, presented, and produced by Jenny Lynch. Music by Purple Planet Music. Sound effects by Pixabay.
https://www.creativescience.com.au
Episode content:
00:00 Introduction and fast facts
02:21 The lives of long-finned eels
09:05 Glass eel noodle activity
WaterNSW Warragamba Dam website https://www.waternsw.com.au/nsw-dams/greater-sydney-dams/warragamba-dam
WaterNSW Education website (for Teachers) https://www.waternsw.com.au/education
Glass Eel Noodle Activity instructions
You will need: A heat-proof cup, such as a teacup or a small mug, 2 tablespoons of potato starch, 1 tablespoon of boiling water, a metal teaspoon, a small saucepan, a stove, and a strainer.
WARNING! An adult must do the steps that use boiling water.WARNING! Glass eel noodles have a very chewy texture. They should not be eaten by very young children or anyone who has trouble with chewing food.
Add the 2 tablespoons of potato starch to a heat proof cup, such as a teacup or a small mug.
Add 1 tablespoon of boiling water to the potato starch and mix thoroughly using a metal teaspoon.
Use your hands to knead the mixture until it forms a smooth dough.
Break the dough in half and then divide each half into about 6 equally sized pieces.
Roll each of the 12 pieces of dough into a thin eel shape, about 5 to 7 cm long.
Boil water in a small saucepan and add the eels to the boiling water, one at a time, so they don’t stick to each other.
Boil the eels for about 15 minutes until they are almost completely transparent.
Use a strainer or colander to carefully strain the eels and then rinse the eels in cold water.